A Step-by-Step Guide to Creating an Online Store using WordPress & WooCommerce
Online shopping has become one of the best methods of business expansion these days. The growing trend must influence many to create an online store and take advantage of the time. If you’re one of them, the blog is exclusively for you.
Before going deep into the topic, let’s understand in a nutshell, what WordPress is and what WooCommerce is.
WordPress is the world’s most popular website builder. Here you can select yours from thousands of stunning designs having a range of features and customization options. Around 42% of the web is built on it only.
Meanwhile WooCommerce is simply an e-commerce plugin for WordPress. WooCommerce turns your WordPress website into a fully functional online store. This is designed to serve online merchants of different sizes from small to very big.
How to Create an Online Store with WordPress and WooCommerce
To help you creating your own online store, we’re publishing the step-by-step guide. We recommend you to follow them sincerely.
Step 1. Choose Your Domain Name and Web Hosting
When you are all set to build your online store, first you need to have two things ready.
Domain Name
It represents your store’s unique address on the web. For example, www.onlinestore.com.
Web Hosting
It’s a remote computer that stores the data of your website and makes them available to users who visit the website.
You can find tons of domain names and hosting providers around the web, you can choose one of them considering both the cost and features. We’re recommending you to go for Bluehost.com, which is officially recommended by WordPress. You can get it for $2.95/mo.
Step 2. Install WordPress
Embark your adventure with WordPress by just installing WordPress on your hosting account. It’s not hairy at all. You need to visit your Bluehost user panel at my.bluehost.com. Then scroll down and find the icon namely ‘Install WordPress’. Click on it and follow the instructions.
In the end, you will find a blank WordPress website installed. You can see this by typing your domain name on the browser (www.onlinestore.com). You can also log in to the admin panel by typing www.onlinestore.com/wp-admin.
You can now convert the blank WordPress website into a fully functional online store with the WooCommerce plugin.
Step 3. Install WooCommerce Plugin
To install a plugin, you have to navigate to the WordPress Dashboard -> Plugins -> Add New. Then, search ‘woocommerce’ there.

Click the ‘Install Now’ button found next to the plugin. The text on the button then will change to ‘Activate.’ Move on by clicking it.
Once the plugin is activated, you will find the ‘WooCommerce’ option in the left sidebar. Upon clicking on it, you will get an on-screen setup page.
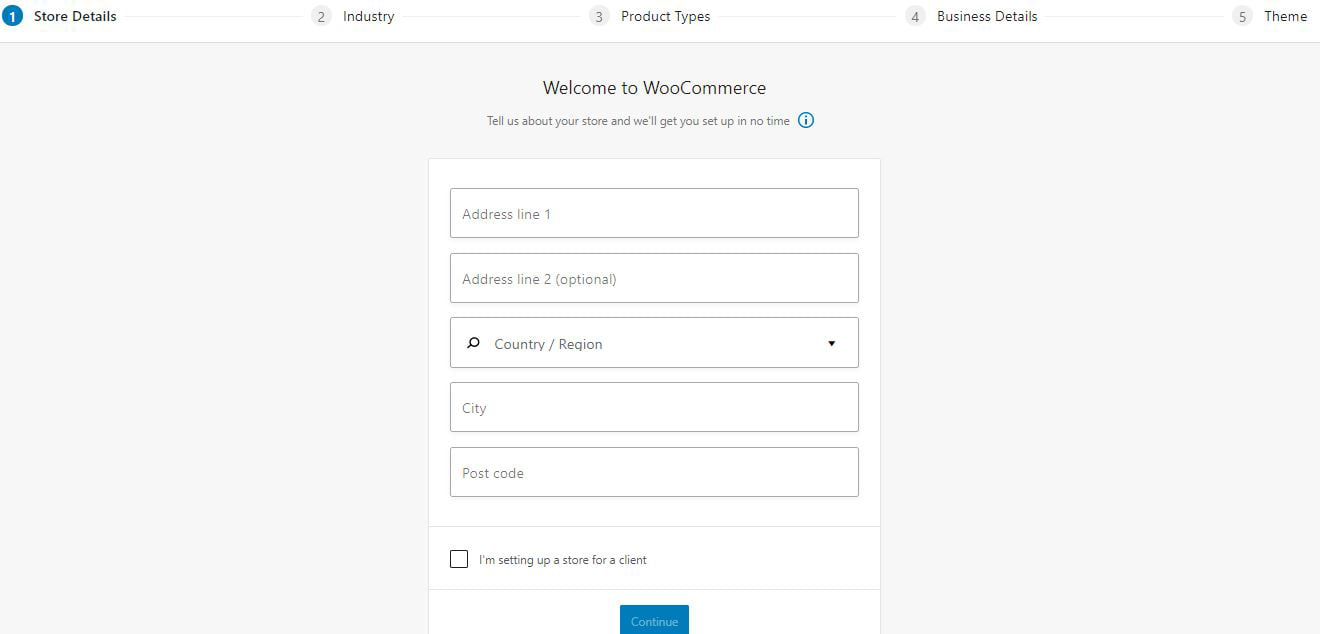
Let’s discuss these steps together.
Store Details
It’s so simple. You can fill all the fields on your own. After finishing them up, click the ‘Continue’ button.
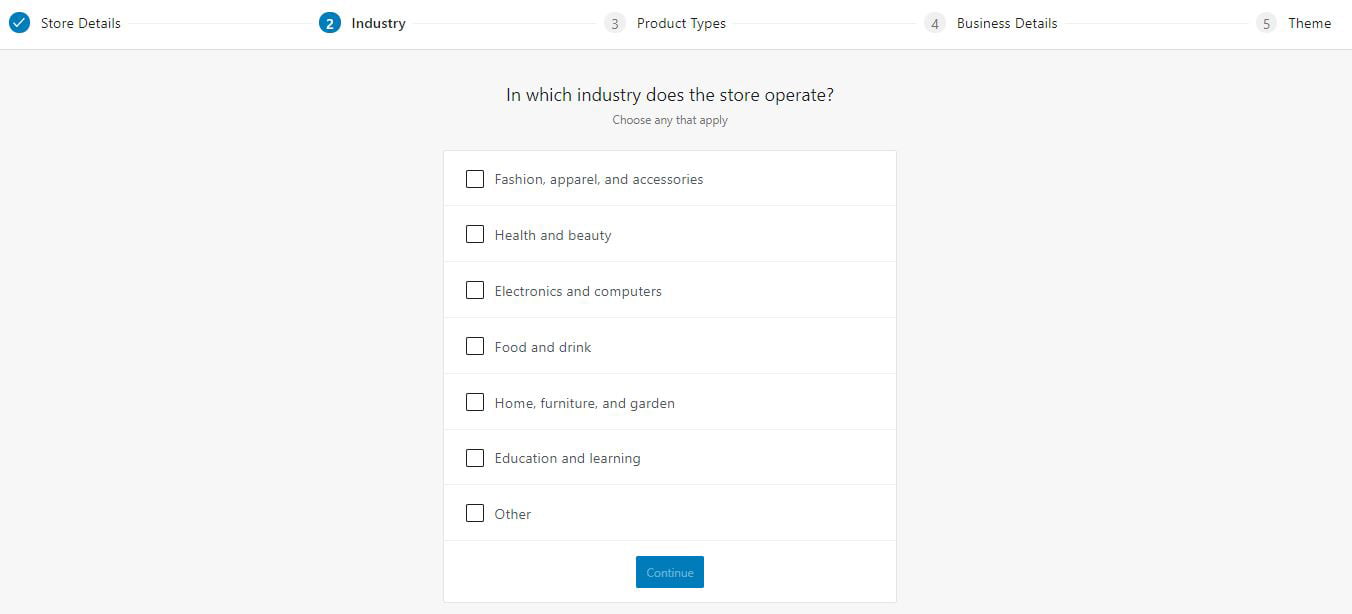
Industry
You need to choose the right industry your store belongs to from various options. Once you’re done, click ‘Continue’.
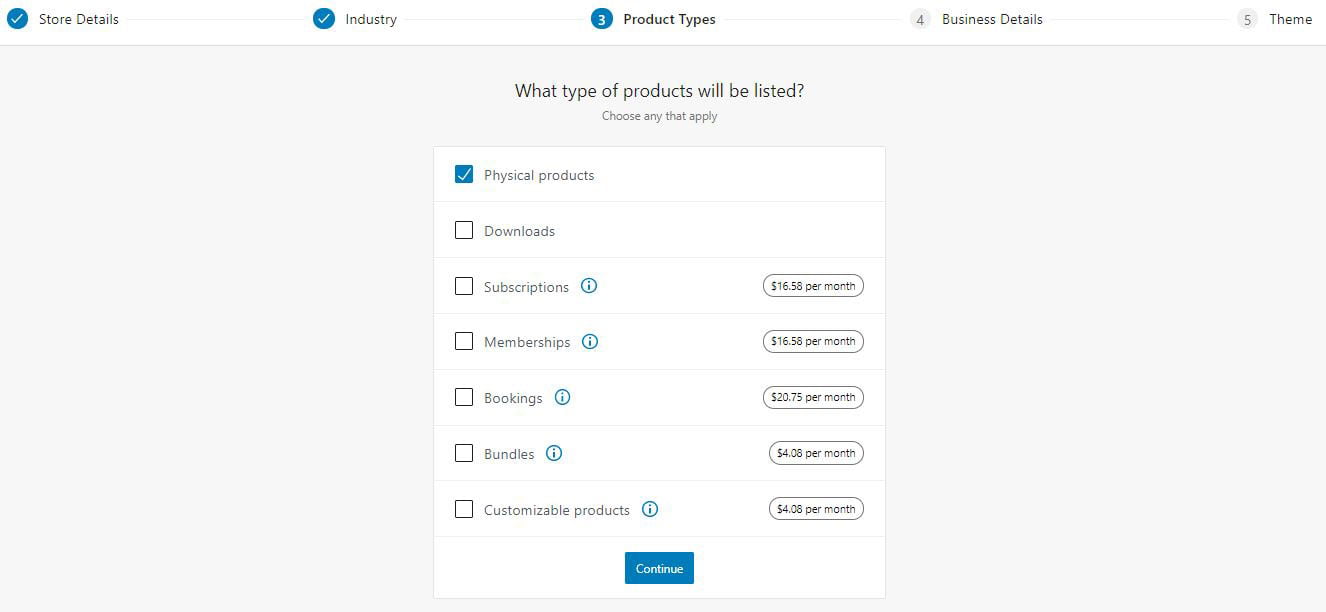
Product Types
It’s time for you to select what kind of products you will be dealing with. You have the options to select from physical products, downloads, subscriptions, memberships, bookings, and many more. You can choose more than one option too.
Business Details
Now you need to look into business details. You need to count the number of products you want to sell and also mention whether you are selling elsewhere presently.
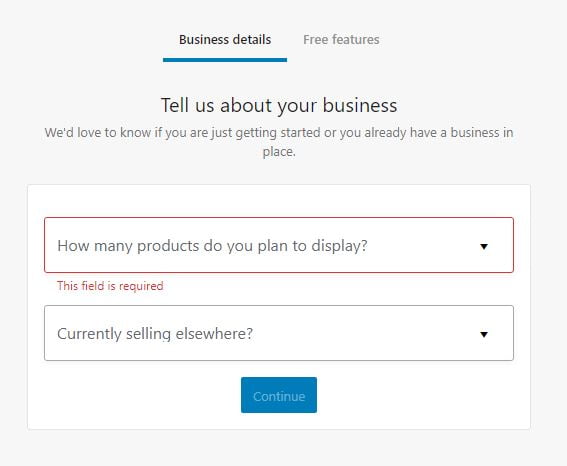
If you are a beginner, you can choose the ‘I don’t have any products yet’ option. Next to Business Details, there is a Free Features tab where you can enhance the online store with free extensions which WooCommerce provides. All are quite useful. Thus, it is better to pick them all.
Theme
WooCommerce, by default, works with the WordPress theme. It will be great if you have already selected your favorite design and wish to move ahead with it. Otherwise, you can opt for WooCommerce-optimized themes that are available with pre-set styles making it easier to visually integrate these into the website.
Storefront is the official WooCommerce theme and is also the most suitable one to properly work with. The default version comes with free, and it is enough to get you going.
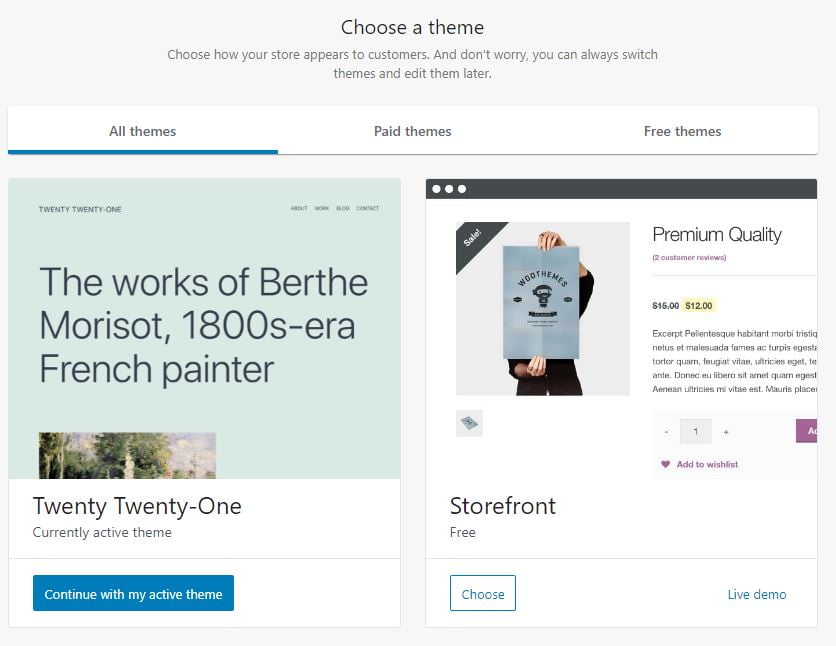
If you have made a decision to stick with the latest theme or have gone for something fresh and WooCommerce-optimized, what you require to do is make sure that each page of the store looks good.
After completing the setup, you can have access to the store check-up list that comprises the most necessary jobs which you should do in order to receive your ecommerce store ready and running.
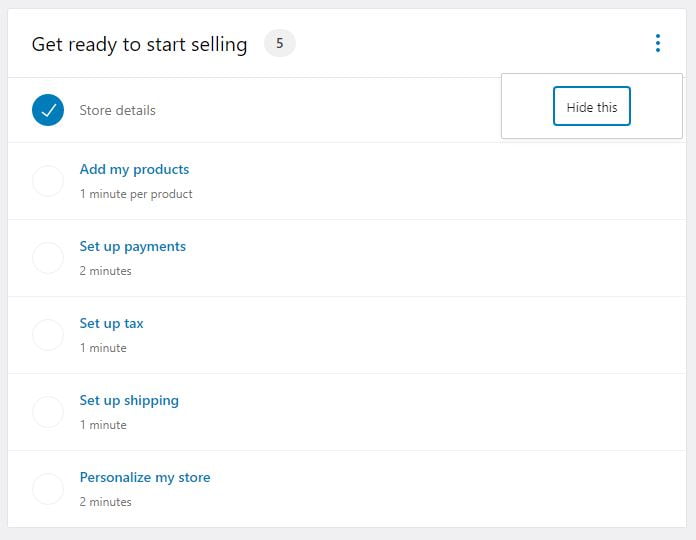
You can also skip this by clicking on the ‘Hide this’ button and just begin editing your store as per your interest.
Step 4. Choose a Payment Gateway, Currency, Shipping, and Set Up Taxes
Prior to adding products to your online store, you need to setup all the money-related things. Get started.
Payment Gateway Selection
When you are operating an eCommerce store, you must have the option of accepting online payments and thankfully, WooCommerce offers such kind of solutions.
To set this, you need to go to WooCommerce -> Settings -> Payments.
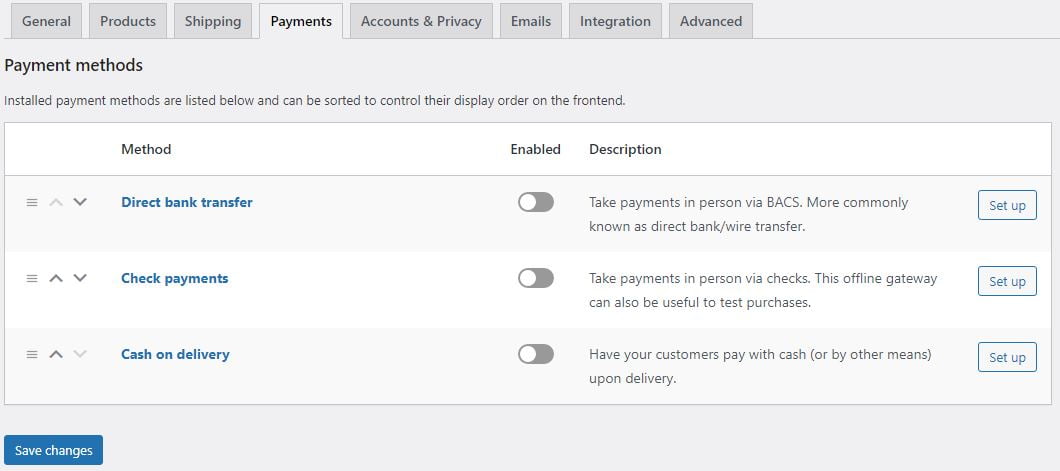
WooCommerce supports various payment methods. One can also integrate PayPal and Stripe too. For this you need to install the ‘WooCommerce Stripe Gateway’ plugin separately.
Understand Sales Tax & Define Currency
Tax is an associated part of any business you do; online stores are not an exception at all. WooCommerce has the option that facilitates you maintaining this with ease.
For this, you go to WooCommerce -> Settings – > General.
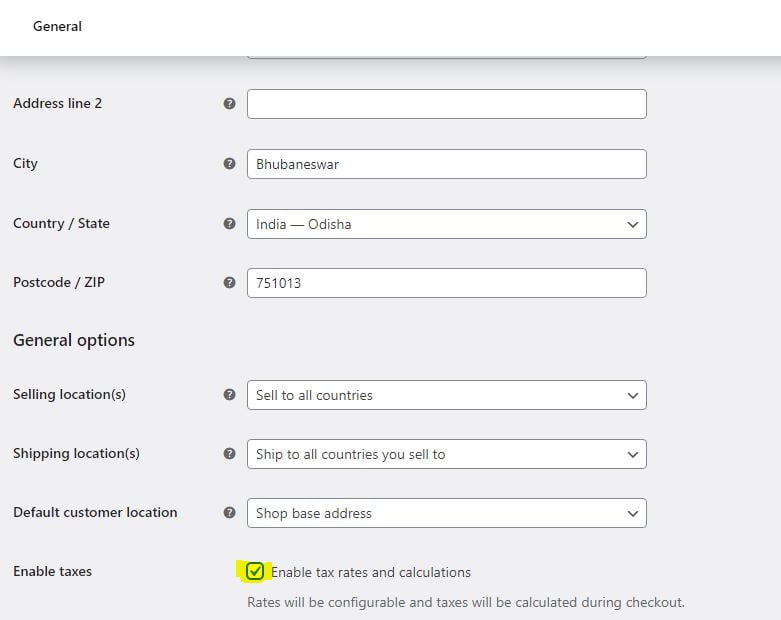
Once completed, scroll down to define your currency options and save the changes.
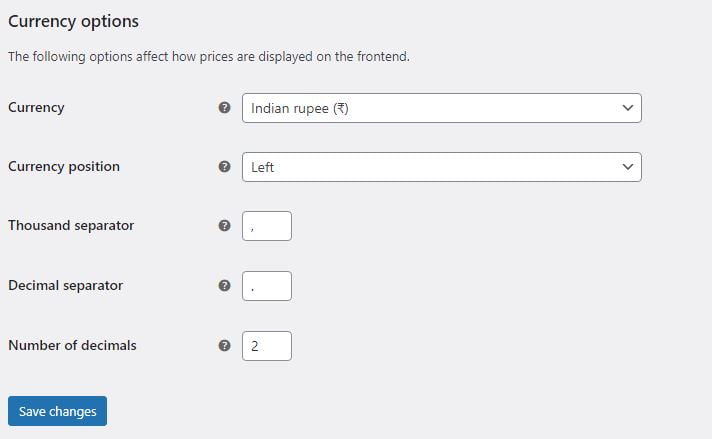
Shipping
In case you deal with physical products, you have to ship those items to the customers quickly, safely, and cost-effectively. You can set the shipping options by visiting WooCommerce -> Settings -> Shipping.
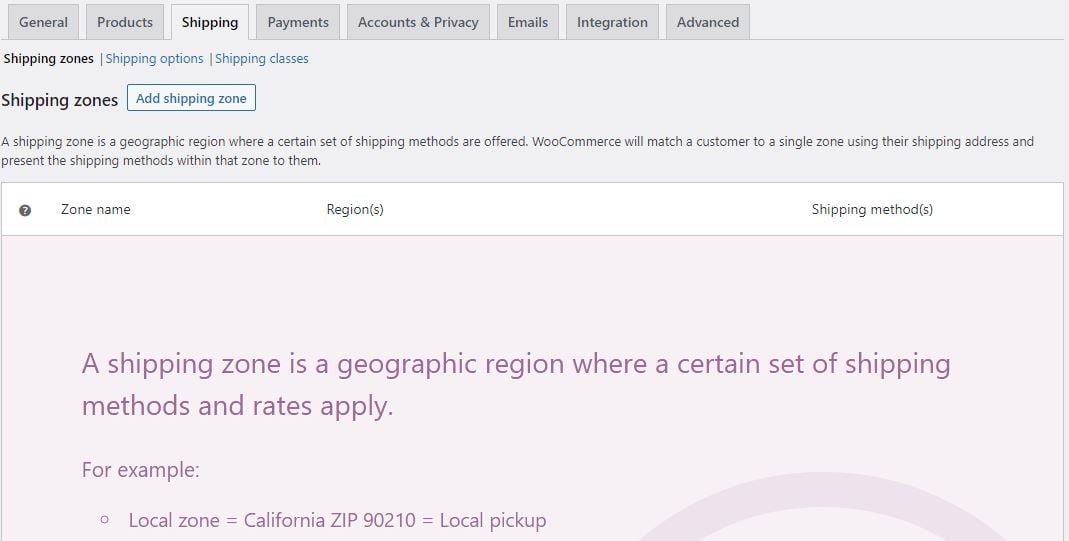
Now you can set shipping zones, prices, free delivery, and many more things. You can outline shipping destination options and enable the shipping calculator on your cart page. There is also an option that can help you migrate live and updated rates from leading carriers such as UPS and FedEx.
In case you want to set your own dropshipping option, you can manage the account with a WooCommerce extension.
Step 5. Build Your Store
You can start creating your online store now. You need to create pages before adding any products. Sometimes the pages are different that are not fit for your store but certain pages like Home Page, About Us Page, Contact Us Page, FAQ Page and Privacy Policy Page that offer numerous benefits to any website.
Add Your Products or Services
The most convenient way to begin working with your products is to go to WooCommerce -> Add Products -> Start with a template. Alternatively, you can go to Products -> Add New.
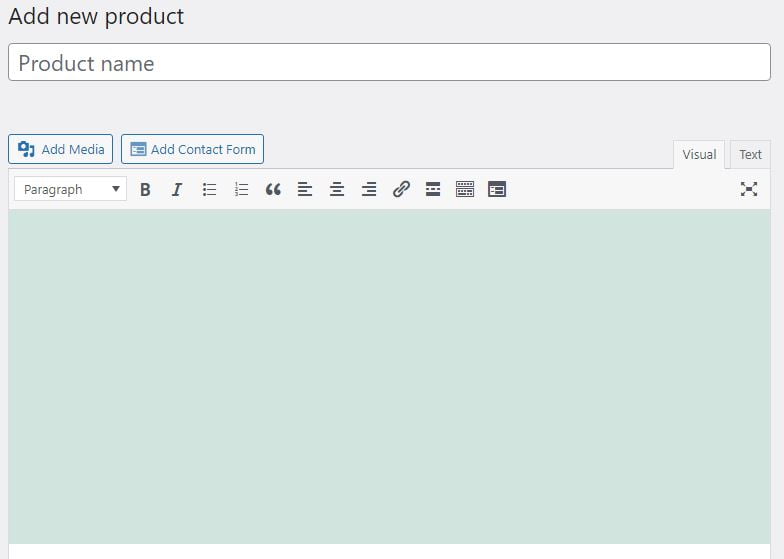
Then you need to fill out the below fields one by one.
- Product name
- Product description
- Product data section
- Short Description
- Product Categories
- Product Tags
- Product Image
- Product Gallery
Once you’re done, click on the ‘Publish’ button and your first product has just been added. You can add a number of goods to your database in this way.
Step 6. Make Your Online Store Design User Friendly
There are certain parameters that make the design of your online store really great. Let’s discuss them.
- The design should be crystal clear and not confusing in any way. If the visitors become confused, they won’t buy.
- The center block is where the products will be displayed. That center content block must attract the attention of visitors just after they landed on the site.
- Sidebars help visitors get more information. Thus you need to enable/disable sidebars based on your requirements.
- Responsive and mobile-optimized website design is of great importance when it comes to an eCommerce store. Over 60% of total visitors come from mobile phones. Thus make sure your website is fully mobile optimized.
- Good navigation structure helps visitors find their required page with ease.
Your Shop Page
You can find here the main listing of your products. The page is available at www.onlinestore.com/shop. You can customize the standard WordPress page.
Many options are there to make your shop page seem good and you can customize it in your own way.
The top feature of the Shop page is found just below the standard content that has a custom part where it shows your product listings.
Shopping Cart
It is another important page that needs to be setup properly. We suggest you to go for the full-width layout. Simply go to Widgets -> Sidebar. You shouldn’t give buyers too many options on this page, apart from proceeding to checkout.
Checkout
Checkout is the final page of your online store that generates revenue as the customers finalize their orders and make the payments here.
The design of the Checkout page needs to be full-width. The only acceptable way out of the page for the purchaser should be to finalize their orders, and not get distracted by the things found in the sidebar.
Conclusion
When it comes to creating your own online store with WordPress and WooCommerce, the level of difficulty is not as high as it seems. Following the aforementioned points can guide you to prepare your own dream online store successfully.
Still you are a bit hesitant to apply them in fear of any kind of error, feel free to contact us. Our support can make your position stand out for sure.











Comment (1)
Hello there! I just wish to offer you a huge thumbs up for your great info you have got here on this post. I will be returning to your website for more soon.